
More Tips and Tricks to Keep Your Restoration Moving!
- Daniel Jessup

- Mar 7, 2021
- 13 min read
Part 2: Tools

Welcome back for part 2 of my series entitled "Tips and Tricks to Keep Your Restoration Moving!" Part 1 concerned organization; and it included several ideas to help you stay motivated and on track to finish your vehicle. Believing that organization is a #1 for work like this, I would have to say that #2 in priority would be tools. Among mechanics and DIY guys like us there is probably nothing more controversial than the topic of tools! Years ago as a grease monkey in an automotive repair shop (you can read about some that at this previous post), I can remember early on listening to seasoned mechanics argue over tools, brand names, quality, and even use. Yep, once a week the Mac tools truck or the Matco tools truck would stop by the shop as the salesman showed us what was "new and improved" or what was on sale that month. Many an ASE technician ended up owing his life to the tool salesman since these quality tools were quite expensive and much of them had to be purchased on credit - especially when a guy was getting started in the industry. Back then I never got myself into debt, but I do remember saving up for my first Matco engine stand - $210! That was a lot of money for me in 1992 but I still have that engine stand today and it is definitely a "made in the USA" quality piece of equipment.


Very few projects like an all-out vehicle restoration will stretch and challenge your inventory and know-how with tools. Most DIY guys like us do not begin with a full complement of what is needed to get various jobs done and so along the way we end up purchasing, borrowing, or scrounging around for the tool that fits the application. Do not be fooled. While much of the 50s and 60s era vehicles can be disassembled with general hand tools, when you get into such items as brakes, engines, wiring, etc, you end up discovering that these parts of the car will require such tools as a brake spoon and pliers, a torque wrench, a set of feeler gauges, etc.
Top 7 Tools You Need!
Let's begin this topic by giving you my list of the top 7 tools you will need to accomplish a restoration project. This list assumes that hand tools such as a set of SAE wrenches, screwdrivers, pliers, punches, ball peen hammers, and a good 3/8" ratchet and socket set are in the garage before you even think about purchasing a project vehicle. Also, such usual garage items as a jack, jack stands, funnels, pry bars, etc are expected to be at the DIY guy's fingertips. So, what are the top 7 tool purchases that the Hot Rod Reverend really wants you to consider before you tackle that project?
3. Air Compressor
The air compressor is the muscle that pumps the blood through your shop; you need a good quality unit! The biggest mistake I have seen DIY fellas make is to purchase an adequate compressor at the beginning and then later decide they would like to tackle the body work. While you may have the PSI you need with most any air compressor you purchase, most often the budget purchases will not get you enough air volume (measured in cfm). Air compressors are measured in both their pressure (PSI) and volume (CFM) - get as much as you can afford!

For the "do-it-all-at-home" classic car enthusiast I really believe that a twin stage, 60 gallon, 5 hp 230V compressor unit is a minimum. When I lived in West Virginia I tried to get by with a single stage and experienced quite a bit of failure with the electric motor. The compressor I used was an Ingersoll-Rand from a local Tractor Supply, and while it did great for such tools as an impact gun, ratchet, or other smaller tools it was no match for consistent dual-action sander work, my pressure-pot sandblaster, or long intervals of spraying paint. When we sold our house in 2015 the buyer wanted us to convey the compressor, to which I agreed in order to spur on the sale and final closing. After arriving in Ohio the search was on and the need was great. A few friends had encouraged me to examine a similar model from Harbor Freight. At first I was reluctant and chuckled at the idea, knowing that many of that store's tools were made overseas with low quality. However, the more I researched the more I discovered that the tank was manufactured in Ohio, the twin stage pump made in Italy and the electric motor made in Mexico with US parts. I guess it was sort of a melting pot of parts and pieces from around the world, but considering the past several years of service this compressor has given me excellent quality for such a low price ($700 back in 2015).

Locate your compressor out of the way but keep it accessible for service!
When considering an air compressor do not leave out your plan to run hard lines and drops. I am not going to get into the comical debate over whether or not to use PVC, but if you look at the pictures above you can see that I use 1/2" gas pipe. I have a regulator just after the tank, a long run (about 30 feet or so to my first drop for an air hose mostly used to air up tires, etc), then another 10 feet to my blast cabinet. (I do have another regulator and then the first filter there). After that my lines take a 180 all the way back to the tank (yep, this is a long run) where I have another regulator and hi-flow filter. With the length of line, the drops (oriented so that moisture can fall out of the air as it condenses) and drains, and the filters, I have had 0 issues with moisture in my lines when spraying or using any tool. This is not only critical to keep corrosion out of your air tools but also for the paint finish.
Here is a good diagram of air line plumbing to consider:
2. Bench Vise
If you have read through any of my blog posts during the build you will notice that a great number of photos will include some part or sub-assembly of the car clamped into a bench vise. Parts both large and small can be clamped into a vise for security and safety while you try to wrestle stubborn hardware from it or maybe drill a hole where needed. When I began the work on the 55 this was one tool I did not have. Rarely a week goes by when I do not use it for some kind of project on the car. The first photo below is from the blog post concerning an E code valley pan restoration. The throat of the oil fill tube had to be trued and the vise was a perfect tool to hold a section of 2" gas pipe as a form before striking the sheet metal pan with a hammer.


I would highly suggest you purchase a vise with at least a 6" throat, and it would be a bonus if you could get one that swiveled. My vise is bolted to my main workbench and is usually free to operate at a moment's notice. Of course, keeping the area clutter-free is job one!
3. Gear/Pulley Remover
I often chuckle when I read questions on social media like this, "Does anyone know how to get this pulley off? I've tried a pry bar but it doesn't seem to work..." If you work on a classic car, purchase a gear remover tool! Different types are available but most include adapters so that you can remove your crankcase pulley, steering wheel, the rear end flange, and even your gears that are pressed on to various shafts. The operation is quite simple with a center bolt that has fine threads making easy work of even the most stubborn steering wheels! You cannot disassemble a Y block Ford without one, and of course if you need to remove the steering wheel this tool is a must have.


4. 12 Volt Power Box
Up until now you have probably been nodding in agreement if you do any work to these old cars, but the 12 Volt Power Box is the most unfamiliar tool in our list. I can remember when I picked this thing up almost 30 years ago - I traded a silly aftermarket radio for it and never looked back. The principles of operation are quite simple - plug the unit into any household 110V receptacle and the power will be transformed to 12V DC. There is a handy switch and two removeable leads with alligator clips.

I have used this tool a countless number of times over the years. Switches, relays, light bulbs, and other automotive parts that need a 12 volt power supply can all be tested by using this simple device. Now of course there are not enough amps in this thing to run a Y block starter but it can handle just about anything else you throw at it. Since it is small and lightweight the power supply transfers easily to an in-house scenario if you are working in the basement or at the kitchen table with parts like heater switches or a 12 volt radio. It does have a 30 amp fuse in the rear so even items such as headlights, AC fan motors, or heater motors can be tested for operation. One of the best trades I ever made back in the day; I use this thing at least once a month and it has lasted for years! While the tool I use most often with this unit (and for automotive electrical testing and troubleshooting) did not make the list separately, I just have to mention the use of a multimeter when it comes to automotive wiring. I would think that many of us own a simple test light, but the value of a multimeter cannot be overstated. Voltage and ohm readouts for resistance and the ability to double check amp measure takes all of the guess work out of it.

5. Grinder/Rotary Tools
"Hot Rod, did you mean to put tools as plural?" you may ask. And I would have to sheepishly say, "Yes," back to you. I say that because in addition to a bench grinder, the electric tools (wired or battery powered) that spin at a very high rate of speed are invaluable to the DIY guy. Most of us may already have a bench grinder - when I moved out here to Ohio I lost quite a bit of valuable floor space. Back at my previous residence I had plenty of room in the garage to have a separate stand for the bench grinder and wire wheel. The cleanup of rusty metal, deburring various pieces, cleaning up the threads on bolts or other pieces just cut with a die - the uses seem limitless almost. There is a great world beyond the simple bench grinder though when you bring it to "handheld" and take the tool to the car!

6. MIG Welder
Years ago I was always a little hesitant to throw my hat in the ring when it came to welding metal. Marrying two pieces of metal together always seemed more like a form of art than science, and as a young man I was never confident that I could accomplish that kind of work. For this restoration project I decided it would be best if I tackled sheet metal repairs myself and took the plunge to purchase a MIG unit. After a lot of research on various welders and customer reviews, I bought one from a well-known restoration supply company. Their customer service has gone downhill the past 4 years or so and I ended up losing some money and time because of their mistakes so I will not give them any free advertising on the blog.

I am happy with the little 110V MIG I have though! In addition to body panels (you can see some of the results from welding sheet metal by reading the post on air deflectors and the one concerning fenders), small items such as weld nuts, a fabricated brake switch bracket, a fabricated heater hose guard, etc have all benefited from the tool. Way back in 2015 one of my friends, who is a master welder and does so for a living, welded up the front cross member with this little unit. He said he was surprised at how deep the welds penetrated on a thick frame like the 55 Ford but Mike did have the heat setting turned all the way up and we used .035 gauge wire. The most recent work I did with the welder concerned the E code valley pan I restored. You can read more about that and see the pictures of the welds if you read this post.

Mike Haines welding up the front cross member with my 110V MIG welder
I could not even begin to think about trying to do all that I have accomplished without a welder in the garage; nor would I like to have paid someone to do it! This unit has been such a tremendous tool keep around and put to good use. My son and I used it quite a bit for his go kart build too - welding up broken frame joints, relocating the engine mount, filling in holes here and there. I weld with 75/25 C02/Argon mix in the gas bottle, and of course for wire I used .035 for the thicker stuff (like the frame repair) and .023 for sheet metal.
7. DIY Specialty Tools
This category of tools is in a world all its own. You will find as you go through your restoration project that certain challenges can only be met by a little ingenuity. Granted, there are many ideas we "borrow" from someone else who has been through all of this before. (I have loaned out my specialty tools such as an engine run stand to friends in the past.) At times we re-purpose certain items to either save a few bucks or because nothing readily available in the tool market fits the bill. The best way to explain this category would be to show you some of the tools I have made for specific purposes.
Paint Rack Cart
Of all the items I have re-purposed, my paint rack cart is at the top of the list. JC Penney was throwing out some of their old clothing racks and I snatched up this gem. It is full adjustable in height, has 4 casters (2 that lock), and disassembles quickly and easily for storage. I have painted a countless number of parts with this rack! When it is not in use, there are large hooks on either side that hold my air hoses.
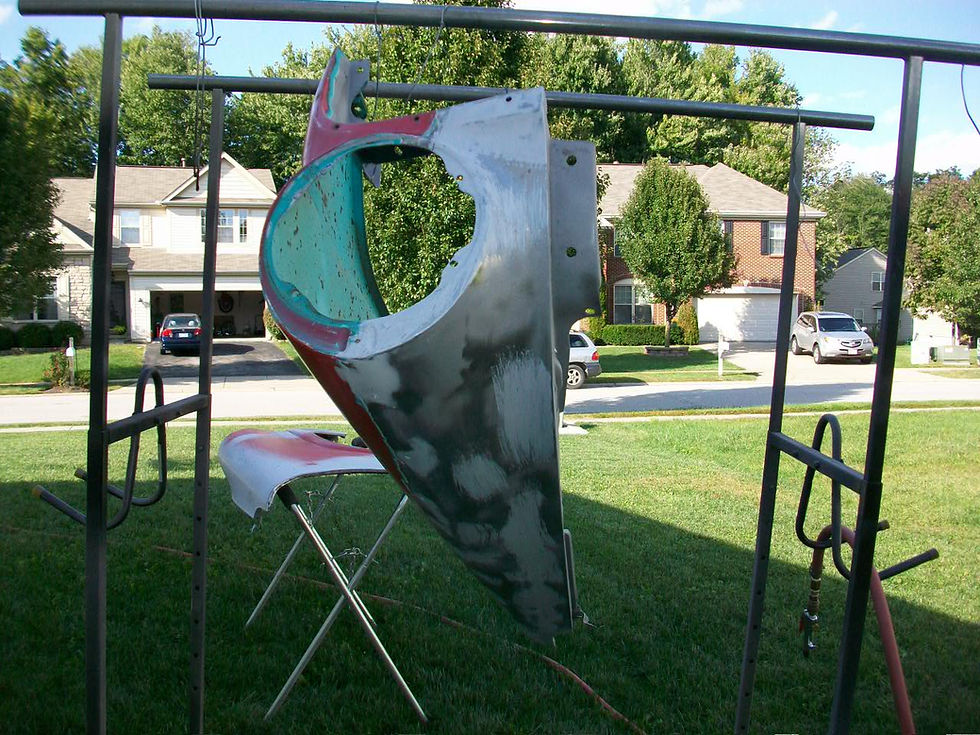
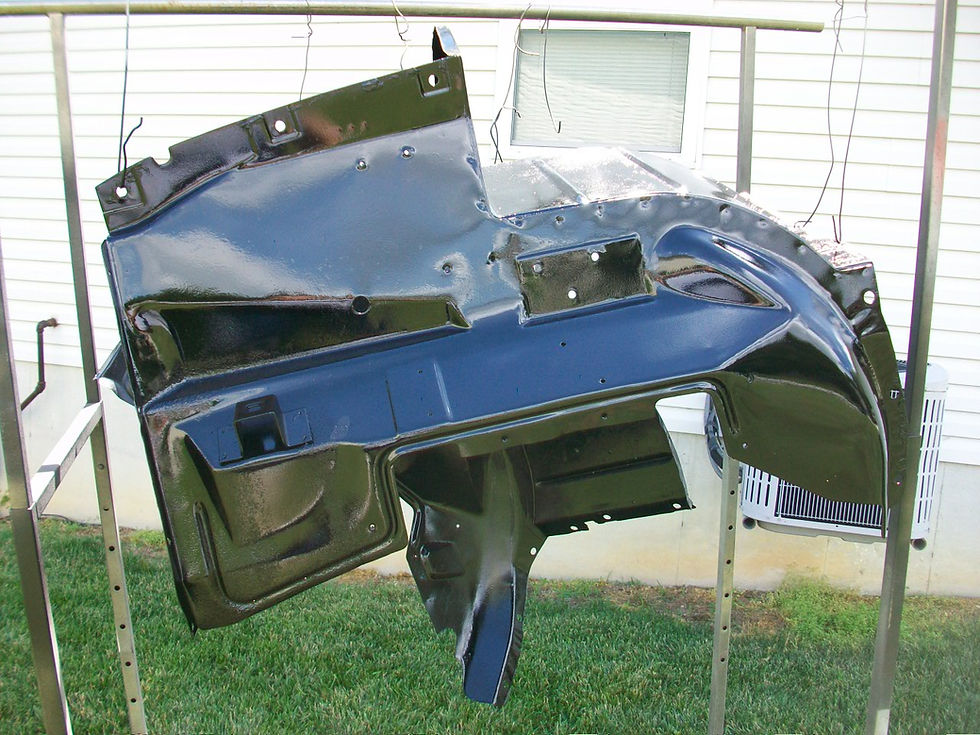
Scissor Stands
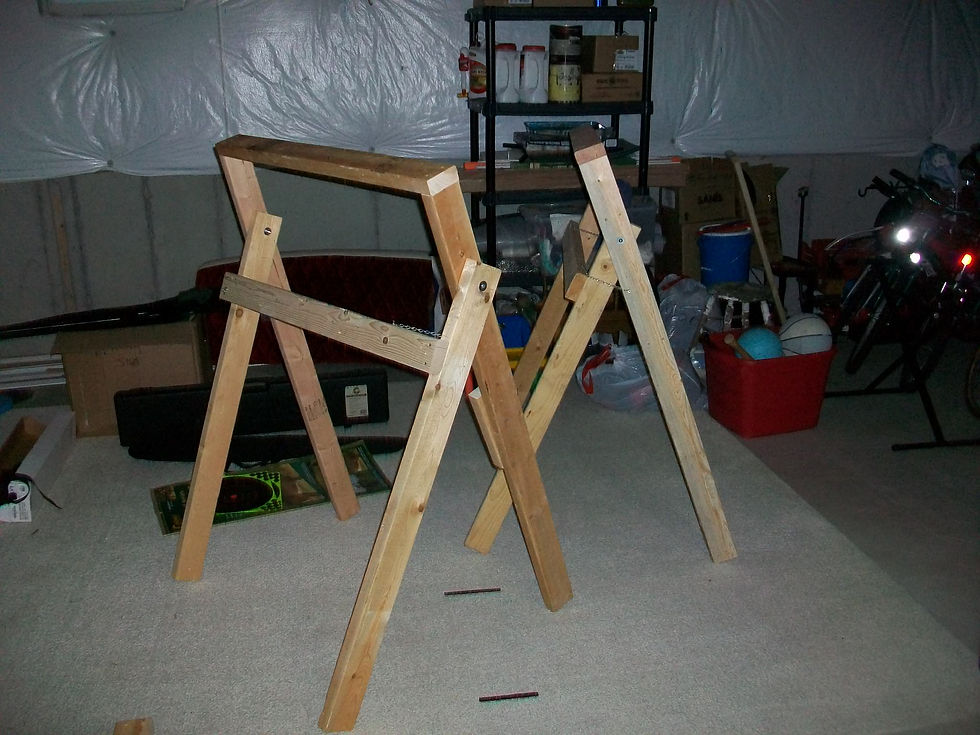


You may be wondering why I would need scissor stands for fenders if many autobody supply stores carry the metal tube versions for inexpensive prices. (Yes, I own several of those too!) The need arose because of the time of year I was painting the fenders coupled with the necessity of painting both fenders during the same session in the booth. You can see from the pictures that I used 2x4's and that the measurements are specific to a 55/56 Ford passenger car. There is small dog leg at the rear of each scissor stand that kicks the rear of the fender out so the paint gun's spray pattern can reach those difficult areas. Also, the stands raise the fenders off the floor level quite a bit so I do not have to bend over as much. The scissor feature only aids in long term storage and for the ability to bring them in and out of the basement stairs! These were painted in the middle of winter in climate controlled conditions.
Floor Shop Light
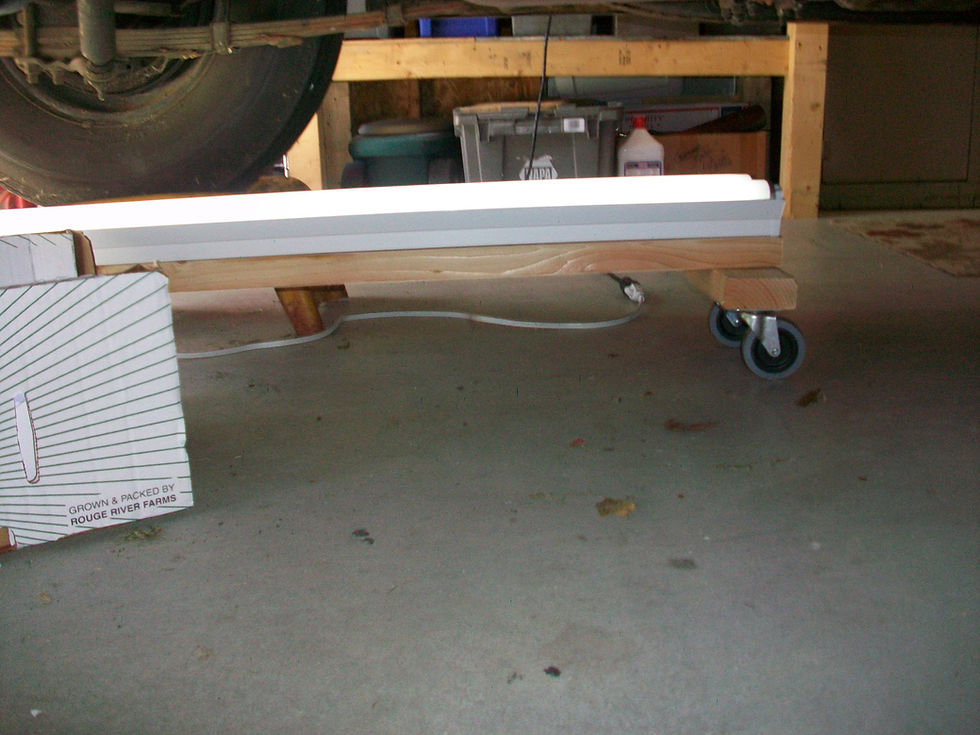
What do you make with 4 extra casters, a few 2x4's, and a leftover 48" shop light? A floor model! This light on wheels has been extra helpful anytime the car is on jack stands. The casters make it so easy to position under the car or to simply roll it away for storage when I am finished with a job. With 4 feet of light I can see most anything along the frame and running gear. This floor shop light is so handy for other uses I find that my family members borrow it on occasion.
Door Body Dolly
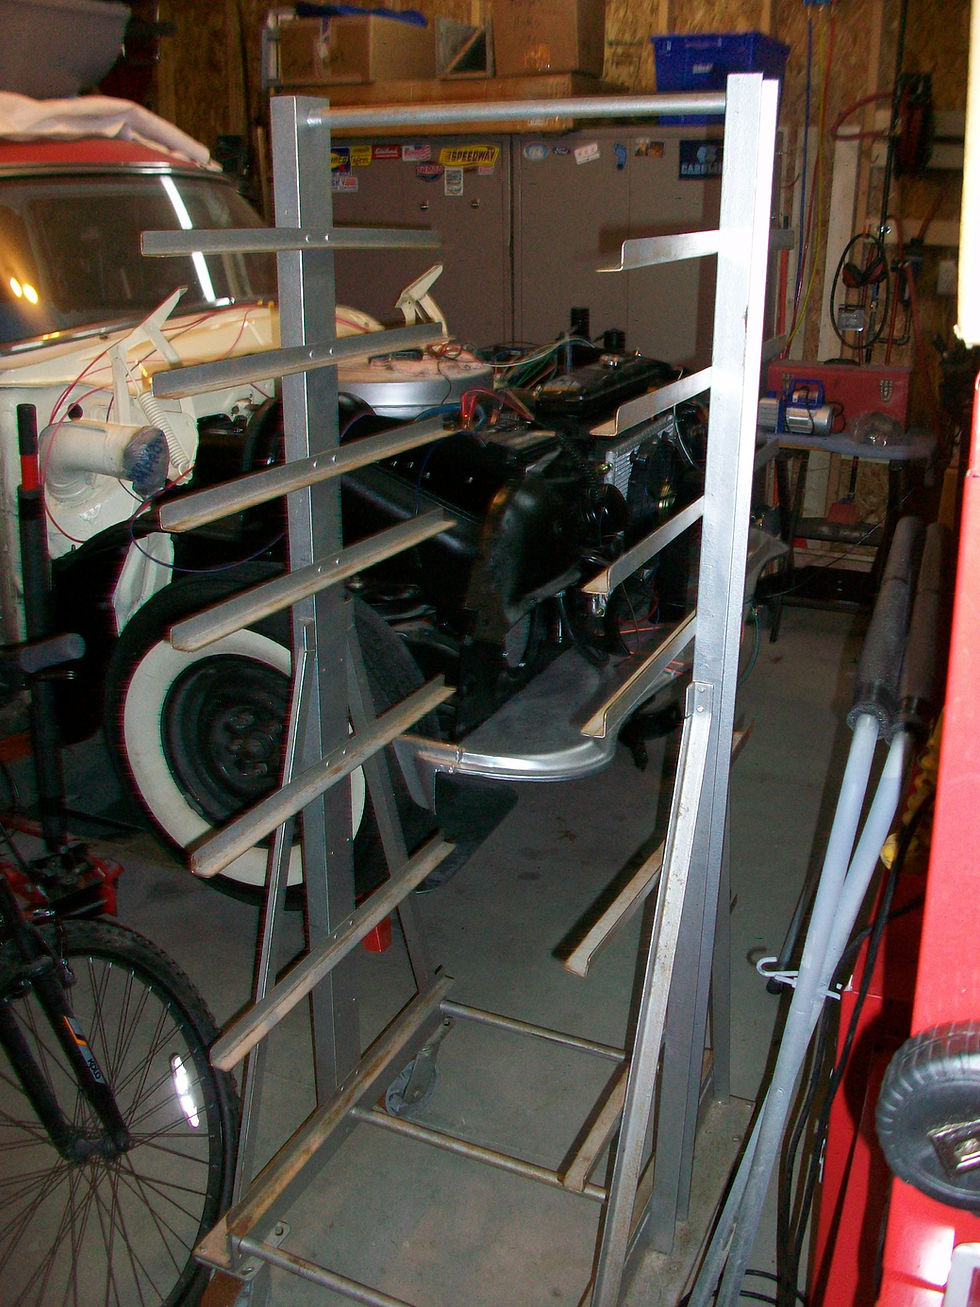
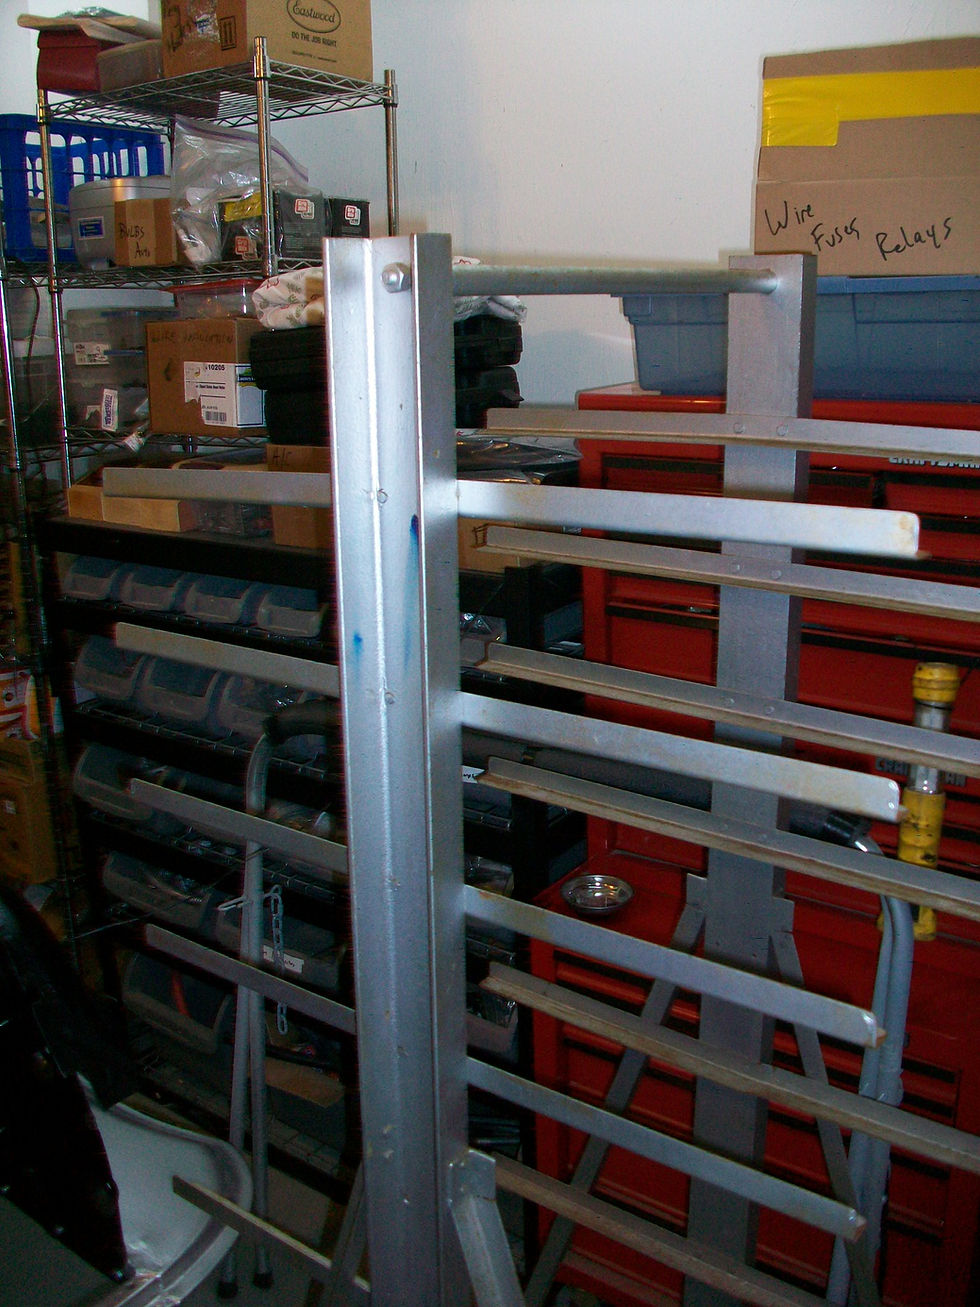


I was truly blessed to find this piece of industrial equipment - for free! Everything on it was heavy duty when I acquired this tall cart, but when I laid eyes on it I just knew it could be modified to carry my doors. The horizontal angle iron had to be cut and trimmed to size, but once I was through with some small modifications the cart served a great purpose. Not only did the cart place the doors in a position easy to access, it also secured the doors compactly and safely. Even with one door completely removed it was very difficult to tip over. Once we got rolling with finish work on the doors I used pipe insulation to protect the painted surfaces. This cart is a valuable DIY tool to have during a restoration for sure!
Locator Pins


By looking at the pictures above it should be obvious how this all took this place. What you may not know particularly is what these locator pins were used to do during the restoration. I used these pins to help me position the transmission in the bellhousing. Getting under any car to install a transmission can be chore - especially if the car is on jack stands. The room you thought you had can be taken up very quickly, a jack can be cumbersome, and the transmission has a tendency to be stubborn. Basically, I had some extra bolts the same diameter and thread pitch of the holes in the bell housing. Once the head of the bolts were cut off I used a dremel to cut a slot at the head and then lightly screwed these into the bell housing. The transmission case just slid right onto the locater pins and away we went!
Blast Cabinet Tube

Restoration work most often means rust removal and certainly it means paint work. I dare say that one air tool I use the most would be my SkatBlast cabinet. These things are easy to use and very affordable. Most parts that fit in the cabinet are pretty easy to blast and remove. However, it's the small parts that can be a chore - you do not want to lose them to the glass bead abyss in the bottom of the cabinet! A cheap, re-purposed cricket tube does the trick.
Temporary Paint Booth


Along the way in this restoration project I have done some crazy things. I have made my share of mistakes and failures - read the blog and you will see what I mean! However, I think the greatest DIY "tool" that helped me accomplish the most difficult, time-consuming, and otherwise expensive work would be my temporary paint booths. Finding a way to erect a paint booth in the basement and having it meet my exact need was a miracle and a bit over my head. The paint booth I put up in the garage worked rather well with my only limitation being the height of the ceiling. (I was able to work around that though.) While the box fans were more than adequate for the smaller parts and short sessions in the basement, a whole-house air handler was needed for the garage booth when the 55's body was sprayed. The booths never kept out the contaminants like a professional booth would have done, but they did a good job in keeping "extra" airborne particles to a minimum and they directed the fumes where they needed to go.
Conclusion: Do not even think about attempting such a monumental work as restoring a classic car without considering your tools, their various uses, and the overall budget you have to keep a full complement of tools in the garage!
Part 3 in the series will be tips and tricks on parts! (One of my favorite aspects of vehicle restoration - you can save a bunch or waste a lot of money depending on your approach.) Until that time, stay safe, enjoy your ride, and look forward to spring. While you are here on the site I do hope you will take the time to read the greatest message ever told.
If you have tips you would like for me to share on the blog, just send them my way at danaxjessup@yahoo.com or leave a message here on the website. Later on this year I do plan to write a post that will include subscribers' rides and projects - thank you to all that have submitted files so far.
The Hot Rod Reverend
aka Daniel Jessup


Comments