
Tips and Tricks to Keep Your Restoration Moving!
- Daniel Jessup
- Feb 19, 2021
- 14 min read
Part 1: Organization

Over the next few months, select blog posts will contain some of the tips and tricks I have learned over the years when it comes to automobile restoration. I have noticed through social media, this website, and my own e-mail address that I field 100's of very good questions each year concerning DIY work on classic cars. While I continually seek to learn skills myself and try to pick up new methods or good suggestions from others, it seems that lately the answers I give repeat themselves. Granted, some of the questions are because new owners of mid-50s Fords are unfamiliar with their car, do not know that manuals exist, etc, but at other times the questions pertain to general restoration work that anyone can perform at home. I am no expert but along the way I believe I have picked up some ideas and work habits that may help.

First and foremost, let's talk organization. Yep, it's almost a cuss word among certain groups of people! How many of us have seen the average guy purchase a project, disassemble it, keep all of the parts in his garage for several years, and then be forced to sell it? By the time that takes place there are parts missing and the price he ends up getting to offload the car and the parts is tremendously low. What a shame! The owner had good intentions at the beginning but because he did not organize from the start he ended up losing interest and ultimately quite a bit of money. (Some of you reading this blog post may have acquired a cheap project that way.) Or maybe you have heard of the guy that bought a vehicle, disassembled it, forgot where things went, could not find the hardware or "oddball" parts, and ended up paying a fortune to recover what he had lost in just a couple years' time of owning the car.


The great deals I have received in parts and project cars over the years have been mostly because previous owners did not stay organized...
Use a Camera
In the modern era, cameras are so cheap and plentiful that there is no excuse for you not to take pictures of your projects, parts, and process. Think about it - there is no way that I could bring the level of detail and documentation to over 2000 readers of this blog if I had never taken pictures while working through the restoration of the 1955 Ford Fairlane. Most of us have a smartphone, and with each successive year the features of the camera installed with these phones improve. Back in 2014 when I began heavily documenting the work by taking pictures and videos I used a very cheap, handheld, Kodak digital camera. These days you can pick up those kinds of cameras (most of them use SD cards) for next to nothing. Time and again I have found myself going back to the digital pictures I have stored so that I could double check the fitment of parts, what parts went with which assembly, how assemblies are oriented, etc. If you have taken the time to read posts throughout the blog then you know that I have run up against problems in the shop manual or FoMoCo diagrams that misinform mechanics even today because the original publication had errors. Without the archived photos I would have never known.
During the first year of storing photos and videos I noticed that the size of the file folders began to grow so I purchased a separate backup drive (1 Terabyte!) to store all of my data. The drive has over 230 separate folders, each named with the day and the contents of that file folder. (ex: Day 37, August 17, Steering Column Removal and Fuel Pump Install) While all of my individual pictures and videos are not necessarily named (although quite a few are), retrieval is simplified by navigating to the folder name because the name describes the contents.

Most of the camera work on the 55 Ford I have done myself - very rarely does anyone else help me operate the camera. This has not been a problem though, tripods are pretty cheap, brackets to hold phones are very plentiful and varied, and setting up the lighting can be quite simple. In making my videos I have even pressed the record button and duct-taped my iPhone to a panel or another object to get the angle I was after. With battery operated lights such as shop lights or magnetic, hand-held flashlights, anyone can take good, quality photos and even videos of the process. Do not overlook videos! Some may think that taking video is for YouTubers or guys like me who have a website like this. However, there have been many times when I will take video of parts or assemblies and talk to the camera to make voice notes so that when I watch the video months later I will be reminded of the details or what I needed to purchase.
Plan/Document Your Work
Since I have my own website you may believe that for documentation the blog posts would be all the Hot Rod Reverend would need. It would not surprise you to discover that I have 3-ring notebooks that record the work I have done to the car. Stop for a moment and consider the fact that I installed a Rebelwire wiring harness (obviously aftermarket and nowhere near original) in the Fairlane. This made it necessary for me to make wiring diagrams. Items such as an electric fuel pump, aftermarket AC, accessory fog lights, and all the rest have their own separate pages whereby full color diagrams are laid out. Take a look at the diagram below and you will discover that I even went to this level of detail for the AC plumbing; especially helpful when you consider that each line is custom made and of course that the hose and fittings are different sizes throughout the refrigerant path.

Your notebook should contain files like spreadsheets, product manuals and warranties, and any other hardcopy that will be useful in the future. Concerning spreadsheets, there are very few documents more valuable than your budget. How many of us working through a project stand back and tally the final cost on parts or shop work? Things can get out of hand very quickly! I like to use digital files like Microsoft XL to plan the restoration, but even a simple sheet of paper that lists your purchases by hand would suffice. Separate spreadsheets for categories such as engine, transmission, paint/body work, brakes, etc can be organized into the binder. It all depends on how detailed you want to be. Product manuals and warranties not only help with initial installation but also with any service work in the future. These documents will be needed down the road when an assembly needs to be replaced or maybe when a part of that assembly needs to be removed/replaced for service. While there is a plethora of information on the internet, having this paperwork accessible all in one place is quite valuable!

The above scanned instruction manual for the Zim Feelzit Valve Set tool is not readily available anywhere because it is no longer being manufactured. Do not overlook documents such as these when you are working through your restoration.
Earlier on in the process of disassembly and reassembly of my 1955 Ford Fairlane I even went the route of having a white board up in the garage to keep a list of current work orders. Not only was I able to "multi-task" on different parts of the car, but I was able to leave the car in the garage for a few weeks and then easily pick up where I left off. Obviously, it was very easy to work through a project/sub-assembly, erase it, and then add another as I worked through the different parts of the car.
Label/Store Your Parts
Of all the problems that stall an automobile restoration for the DIY guy this has to be at the top of the list! You can find us saying things like this: "Now, where did I put that cable?" "Honey, what did you do with..." or even "What is this doohickey for anyway?" Let's face it - disassembly is easy. We love blowing things apart and tearing it all up. It's the laborious details of labeling, organizing, and storing each and every part to the car that makes the work seem endless! As organized as I have been over the past few years I too have misplaced parts here and there. Granted, I did move a few hundred miles out here to Ohio after the restoration process had begun, but even after getting situated in a new garage I still had a little trouble from time to time locating smaller items from sub-assemblies.
Large body parts are easy to locate and recognize but hard to store because they demand so much room. Small pieces of hardware are easy to store but can be difficult to recognize because many of the sizes (especially length) are specific to certain areas of the car. Early on I stored the fenders, hood, and other pieces of sheet metal in the rafters of my garage. Just looking at the picture below can give a good idea of the "footprint" such body parts will take up.

At this time it would be helpful to add that as I took apart each piece of sheet metal, notes were made on their assessment. For instance, look at this driver's side air deflector...

Since you don't necessarily tackle the body work on each and every piece as you remove it from the car, make some notes on what you will have to do as you plan to go forward with the work. (this refers back to the Plan/Document Your Work section above) The passenger side air deflector was in great shape, but this driver's side needed quite a bit of attention. While I was working on other parts of the car I made a notation to either find a replacement or tackle the repair myself. If you want to see how this repair was handled, visit this post on my blog.
Probably the greatest chore in disassembly is labeling and organizing all of the small pieces of hardware. I believe it good practice to leave the hardware assembled on the panel if you can. (i.e. after removing a nut, re-install the nut to the bolt after removing the panel leaving the loose hardware fastened in position) You won't always be able to re-install the hardware to the panel or the sub-assembly but making that effort will help you when you get ready to re-assemble. So many lengths and/or positions can vary among parts! Take your time when you remove panels and other sub-assemblies. For instance, while removing the driver's side fender I discovered this stack of washers used as a spacer.


I did not need to take a measurement to record the spacing; all that I had to do was bag and tag the set of washers with their location identified and then stored in a box that was labeled as "Driver's Side Fender Hardware" so that I could retrieve them in the future. I do recommend that you work on one section of the car at a time. Multi-tasking at this stage is not very helpful unless you are extremely organized. I used plastic sandwich bags and small transparent food containers purchased from the dollar store.

One word about using a marker - oil and other solvents can smear or at worst remove the writing! Keep things as clean as possible on the outside of your containers. While this was not a problem for me during the work on the 55 Ford, I have seen where others will actually write on a 3x5 card and drop it in the container as well so as not to lose any vital designations.
For long term storage most will use cardboard boxes. I certainly have. The best idea is to use plastic bins with lids. Transparent bins are best of course, but some of this is the age-old question "Restoration work costs money, son. How much do you want to spend?"

I do not know about your place, but at my house space is always at a premium. It seems that when you "blow apart" a car like this, every available nook and cranny gets used up for parts storage. Build yourself some shelving if you do not want to afford to buy it. 2x4 construction of legs and OSB shelves or leftover plywood are pretty sturdy and cost effective.


Separate Finished Assemblies. As you work through the restoration process you will find yourself the manager of not only the restoration of an entire vehicle but the foreman in control of all the parts that make up said vehicle. Some assemblies you may ferry out to local businesses. Others you may have to ship to a company to have a sub-assembly rebuilt. (ex: steering gear, speedometer/odometer assembly) And yet there are so many other jobs you will decide to tackle yourself (like my rebuild of the 3 speed overdrive manual transmission - a list of those posts are here). Whatever the case may be, you will want to separate the rebuilt parts from the parts that still need attention. This may not be difficult if you are patient and just wait until the current project is through and installed on the car before continuing with anything else, but I would imagine that most of the work you would do would include trying to tackle another piece to the giant puzzle while you are waiting "for the paint to dry" or for the parts to be returned to you. In these scenarios, supplies such as shrink wrap (rolls are available in the aisles of department and home improvement stores) and other packing material are helpful, especially where it concerns finished engine parts or painted pieces. During the restoration of the 55 Ford, I purposely painted quite a bit on any particular day when the weather was nice even though I knew that some of the parts I had on the rack were not going to be installed for quite some time.

Prepare Supplies and Tools
Not only should your vehicle and its attendant parts receive your attention to detail when it comes to organization, but so should your supplies and tools. If you have never performed restoration work to the level of completing a car or truck then you are in for a surprise! Consider such expendable items as tape, masking paper, paint, solvents, oil, grease, sealants, and even sand. All of these purchases will add up over time. While a future blog post will cover more detail on tools and supplies, for this article I clearly state that maintaining your tools and supplies will keep you from frustration and frivolous expense!


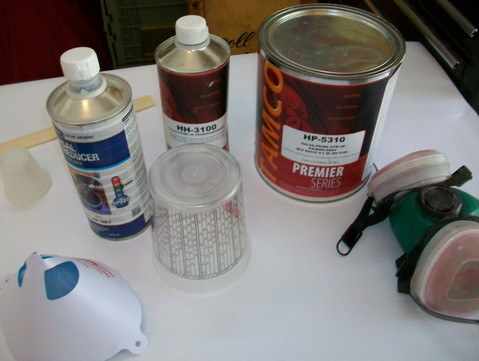
Garages and workspaces have a tendency to become very cluttered. It seems that every horizontal space can quickly become covered with parts, tools, cleaning supplies, and all the rest. Just look at the various pictures above - they represent the tip of the iceberg when it comes to the bulk of tools and materials. Allow me to make a few suggestions concerning organization:


Use tool storage cabinets and tool boxes, but keep "related" items together. I have one tool box dedicated to a Dremel tool and its attachments, one for plumbing tools (a handheld vacuum pump, hose cutters, flaring tool, etc), one for body tools like a hammer and dolly, a spoon, a pick and other items, and various other tool boxes for vehicle categories. Each tray in my roll away tool box is dedicated to a particular tool (ex: SAE wrenches, screwdrivers, etc) and is labeled for easy retrieval. I have a tool cart that contains all of my wiring supplies, including bulk wire in various colors and thickness, terminal ends, pigtails, shrink wrap, etc. I use a salvaged 2 door, 6 foot cabinet for my all of my paint and body work supplies. The idea of related items being together is easy to set up but more difficult to maintain. We are all tempted to leave a tool out and just throw it in the nearest box when done. Do not give in! Put your tools and supplies back where they go so you can find them pretty quickly the next time you are in the shop.

Use peg board near your workbench. Hands down this has been one of the best improvements I made many years ago. I put my most commonly used tools on the peg board within easy reach just behind my main work bench. Peg board can also hold odd shaped tools or other supplies when needed. One of my shelves for cans of lubricant, solvent, and cleaner is a simple, small board resting on two pegs that are 5" deep - works well and keeps the bottles and cans off the workbench. Rolls of masking tape, wire, or the handy pipe sealant tape are pretty easy to retrieve when resting on a long peg as shown.

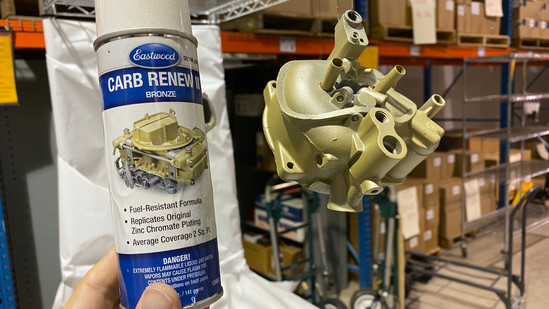
Use labeled bins for hardware. A number of years ago my dear wife purchased an industrial, free-standing storage bin rack for my birthday. I have labeled each bin with categories such as Radiator, Gauge Hardware, Carburetor, etc. Finding smaller items has been never been easier. The bonus for the rack is that it includes a shelf at the top where I can store larger containers or other bins for miscellaneous hardware. Even in my basement storage I take advantage of storage containers with multiple compartments (like the container used for carburetor rebuild parts and gaskets for the Holley 4000). You can also see from the photos that I label each cardboard box so that I know the contents and each label is in clear view. Most of the clear plastic boxes do not get labeled because identification is pretty simple since the items inside are pretty easy to see.


Consider the Process
The last reason a restoration project stalls out is because the process was not considered too well. Think of the end in the beginning! We've all heard the stories - what started out as a simple repaint ended up being a major body-off restoration. You can read back through my posts from day one and discover that I should have considered my process a little more than I did. Granted, there may be surprises along the way like my discovery of major sheet metal rot and had to replace a floor pan section. Those types of "gotcha's" can certainly make the work stall out if the DIY guy is not fully committed. Answers to questions such as "Is this going to be a daily driver?" or "Am I building this vehicle to be judged at car shows?" are very important as it pertains to investment. Money, time, work, and devotion should all be considered before you even turn a wrench and remove the first bolt and nut!
The process also involves the "processes" in which you engage each time you are in the garage. Disassembly is easy; it's the re-assembly to working order that often eludes us! Recently a subscriber to the blog asked a very good question, "Just wondering how big is the repair job for the door latch on a 55 Ford Country Sedan?" Here is someone that was considering the process before just randomly removing hardware! I was able to reply to him with the following diagram...

I also sent quite a bit of verbiage and other photos which I will not include in this post but suffice to say the major issue he was going to face would have been the glass run assembly being in the way of the door latch removal. While the glass run assembly can be removed this is difficult to do because of two reasons: 1. Corrosion over the years that causes that metal channel to seize up in the slot and 2. Often the window has to be removed (which means the vent assembly has to be cocked towards the rear). I am sure that the subscriber could have done all this work, but after he looked it over and considered the scope of what was involved he decided to wait until the weather was much better. (He did not want to be out in the cold that long.)
Some processes will depend upon your skill level, and others will depend upon what you have available. Take for instance the front end sheet metal. Many DIY guys like to remove the panels, weld, straighten, fill, and prime before re-installation. After the primed panels are installed then everything gets lined up and a final color coat is sprayed. I considered the process and because I was limited on my room to spray paint in the garage, I finish-sprayed all of those parts and put them together delicately. Masking tape on the edges and much patience were needed to keep from damaging anything. But, looking back at all of that I ended up discovering that was the same process the original assembly line used when front end sheet metal was installed.

Conclusion: to be successful in this age-old endeavor of automobile restoration you must have some level of organization!
Part 2 in the series will be tips and tricks on tools. Until that time, stay safe, enjoy your ride, and look forward to spring. While you are here on the site I do hope you will take the time to read the greatest message ever told.
If you have tips you would like for me to share on the blog, just send them my way at danaxjessup@yahoo.com or leave a message here on the website. Later on this year I do plan to write a post that will include subscribers' rides and projects - thank you to all that have submitted files so far.
The Hot Rod Reverend
aka Daniel Jessup