
1955 Ford Part 48: Interior Panels and Trim Part 1
- Hot Rod Reverend
- May 7, 2018
- 3 min read
Updated: Apr 14, 2025
Interior Panels and Trim Part 1

If you have been following the blog posts on this website for any length of time, you are keenly aware that this build is not necessarily an "original restoration" of all components, trim, etc. Since the plan is to drive this car on almost a daily basis, and since budgetary concerns are an issue, I decided to keep things simple for feasibility of modern use, cleanliness, and to use what materials I had on hand. Of course, such simple upgrades as power brakes, emergency flashers, back up lights, 3 point seat belts, etc, make all the sense in the world. If this were a Crown Victoria or a Sunliner I would probably stick to a more original functionality and appearance.
The next step in our process concerns installing the rear panels and trim. These items must be put in place first the rear seat, and of course the carpet has to be down as well before both sets of seats can be installed, so on with the show! Up first was to ensure that all of the holes on each panel matched up to the mounting holes on the sheet metal body. For the original holes - the armrest, the window crank, wire clips, etc, the procedure was all a matter of rote. The tricky part for this work was getting an exact match on the mounting bracket for the seat belts (upper and lower on the pillar).

The panel was installed and removed a few times as measurements were made, checked, and checked again - we only desired to make ONE hole! The photo above shows the bracket for the mount of the seat belt re-tractor. This had to be square if the exterior portion of the panel was to look as if it fit well. As you can see, one bolt goes through the floor to a retainer plate, and the other bolt (not pictured) secures the re-tractor and lower pivot to the bracket. That bolt must go through the panel.
When the panels were mounted in position on the car, it was time to get the quarter window garnish modified. First, I had to secure the window whiskers to the trim. I ended up using super glue instead of the staples.


Next, we mounted the trim pieces to the body to line things up and mark our hole locations for the upper seat belt pivot. Back a long time ago I had decided to use the existing position of the coat hanger hook (remember the thin sheet metal mount was removed from the pillar and I welded in a plate specifically for the pivot). These holes were marked a step drill was used to give me clean holes for the bolt to pass through.


You can see in the photo above that I like to mark the final diameter of the step drill by using masking tape - no need drilling a hole that's too large!! Once the holes were enlarged just a little, test fits were made once again and wouldn't you know it? Success!


For the final mounting of the pivot, I did install a plastic bushing between the seat belt bracket and the garnish. The pictures below show the installation of the thin stainless strips that attach to the bottom of the garnish molding. Those clips are pesky - small and irritating. But everything fit up well and the finished product looks good.


The last thing to do was to put the black cover back onto the seat belt bracket (first picture below) and test it out - I was pretty happy with the results.


You can tell from the picture above that I need to paint and re-install the rear arm rest (there is a cushion and an ash tray that go into the pockets. Also, if you know the Fairlanes well, you will note that there is another piece of long, thing stainless missing that should be on the panel itself. Since the front door panels will not have them (too many tabs are broken) and I cannot locate these stainless strips we will leave them off for now. One day when the current seat covers wear out and they have to be replaced we will take care of the panels with more trim. For now, this will be fine.
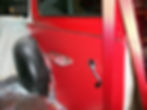
The door panels will be covered in a later post.