Building a 312 Y Block for the Fairlane! (Part 3)
- Daniel Jessup

- Mar 9, 2022
- 7 min read
Updated: Apr 6, 2024

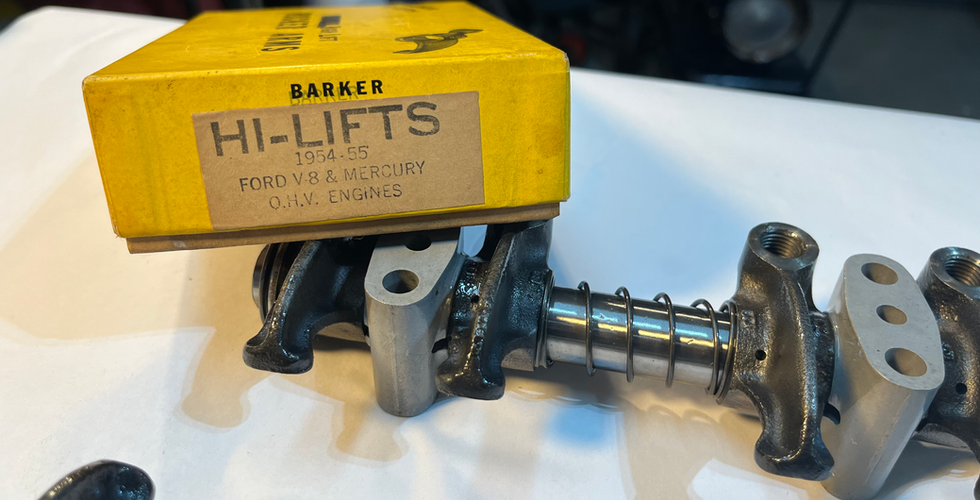
Barker, a company no longer in existence, offered Hi-lift Rockers for the Y Block back in the 50s!
If you follow the blog then you know full well that I am pretty frugal. I am patient, wait for the right deal to pop up, work on my own equipment and parts as much as possible, and of course I do quite a bit of swapping. Swap meets are much more enjoyable to me than a car show. I even enjoy finding parts online as different listings show up every now and then. A few years back I fell across some NORS vintage speed parts. The photo above shows one of the boxes from a company in California named Barker. The packaging was so old that there was not even a zip code listed on the address label for the business. Yep, these are hi-lift rocker arms for the Y Block and they were well preserved in cosmoline. I have been saving a new pair of rocker shafts, 8 very nice stands, and some of the other hardware for putting the two assemblies together.
The slideshow above gives a few stills from the assembly process.
For this go-around I decided to set the shafts up to be pressurized, deleting the overflow tubes. This idea gets a lot of press and quite a bit of controversy too when mentioned on social media or online forums. If you are interested, you can view the video below to get all of the details concerning what is involved and what I believe is the best way to go about putting the rocker arms together for performance engines. Tim McMaster, the machinist and world record Y Block holder for the fastest Y Block ever, uses much the same method. And, to be honest, I followed many of his tips and advice. (Credit is given in the video as well.) Thankfully, I can cross off one more sub-assembly completed for this 312 Ford engine.
Barker Hi-Lift Rocker Arms for the Y Block!
Header Update
While I was out of state one of the sets of headers that I referenced in a previous blog post showed up on my doorstep! As you can see, I have already put the passenger side in the blast cabinet and it came out pretty nice - I may end up putting it back in next week just to touch it up a bit before coating it. When I posted the following pictures to the Y Block Facebook group I had a few well-known Y Block veterans confirm that these were made by Jerry Christenson. They sure are well put together and the rust is only minimal.

The headers have a 2.5" exit (OD) at the collector.

The flanges have ridges to help with port seal.

It is easy to see how tightly these headers "hug" to the block.

I am told that this tab helps to make the exhaust pipe a slip-fit.
From what I can see these are a tri-Y configuration, although the tubes are certainly not equal-length, etc. If Jerry Christenson did in fact make these then I am very sure they are tuned for good exhaust flow and power. Hopefully I can mock these up soon and start considering installation options. (I am waiting for the RexHP headers to arrive first, will compare the two, and then make a decision.)
Rear Main Seal
As promised, here is an article posted by Tim McMaster concerning how to install a rear main seal. Obviously, the pictures show the block upside down and on an engine stand. I will post my two cents at the end and give a little advice on tackling this chore if the engine is in your vehicle.
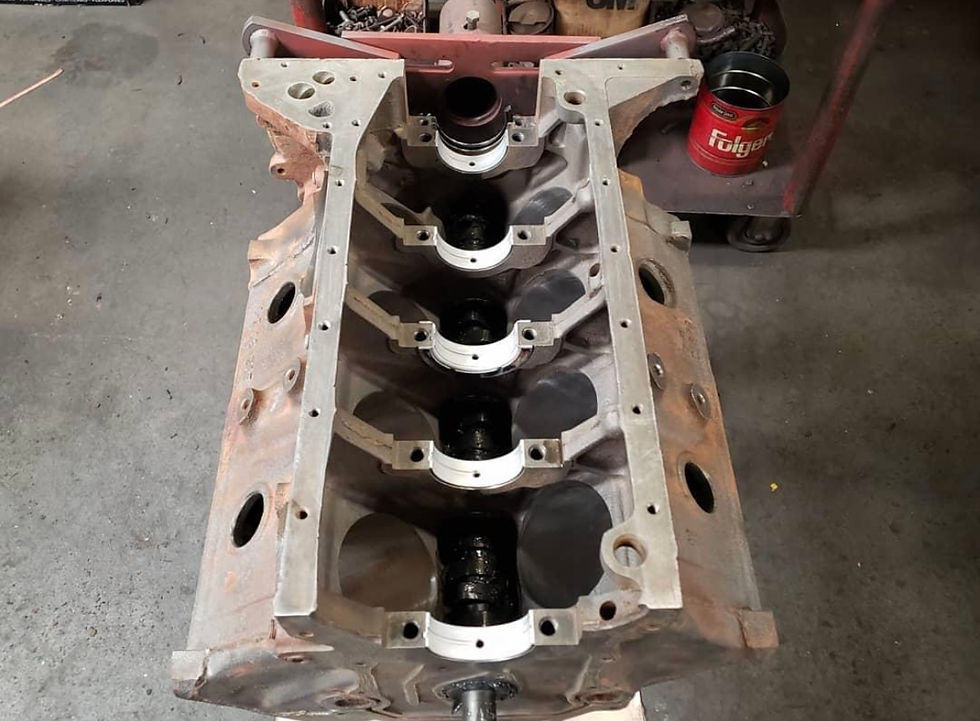
The block and seal retainer must be clean and true.
I've been asked so many times how I install the rear main seal in a Y Block so it doesn't leak. Well this is how I do it. First, the block and seal retainer must be clean and true. Next, install the seal in the block so it is clocked 10 degrees away from the mating surfaces of the block and retainer. Next, slip the lower portion of the seal into the block, pushing the lip against the crank as you roll it in so you don't tear or scrape the back of the seal. Rub a little, VERY LITTLE, rtv on the side groove of the retainer and on the block where the side seals go. Holding the side seals in place, slip the retainer carefully into its position. Now bolt it down and drive the pins in place between the rubber side seals and the retainer, not the block side. Done! If you do it correctly you shouldn't have a leaky rear seal! Good luck!
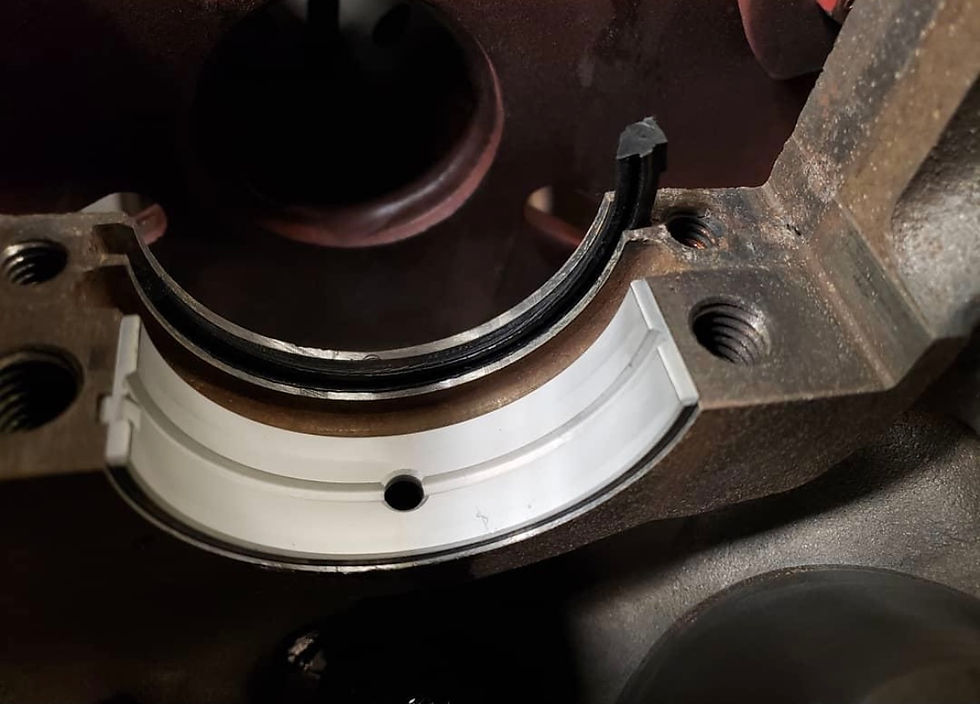
Install the seal (with lip facing inward as shown) clocked 10 degrees.
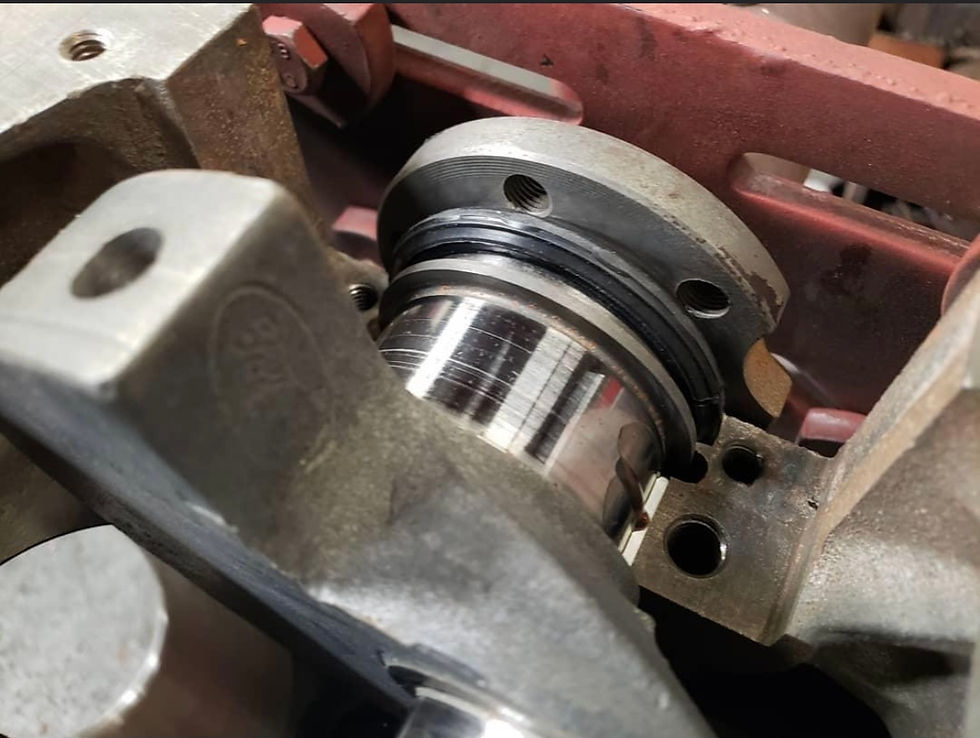
Push the lower portion up against the crankshaft as you roll it into position.
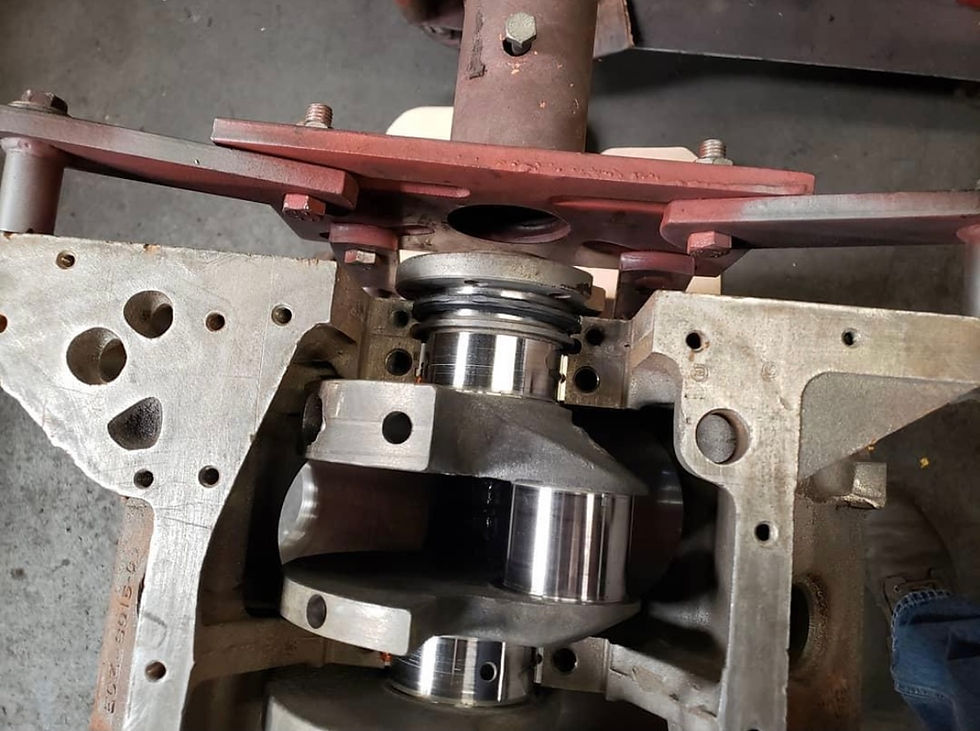
Obviously, set your crank in position next and torque your mains!
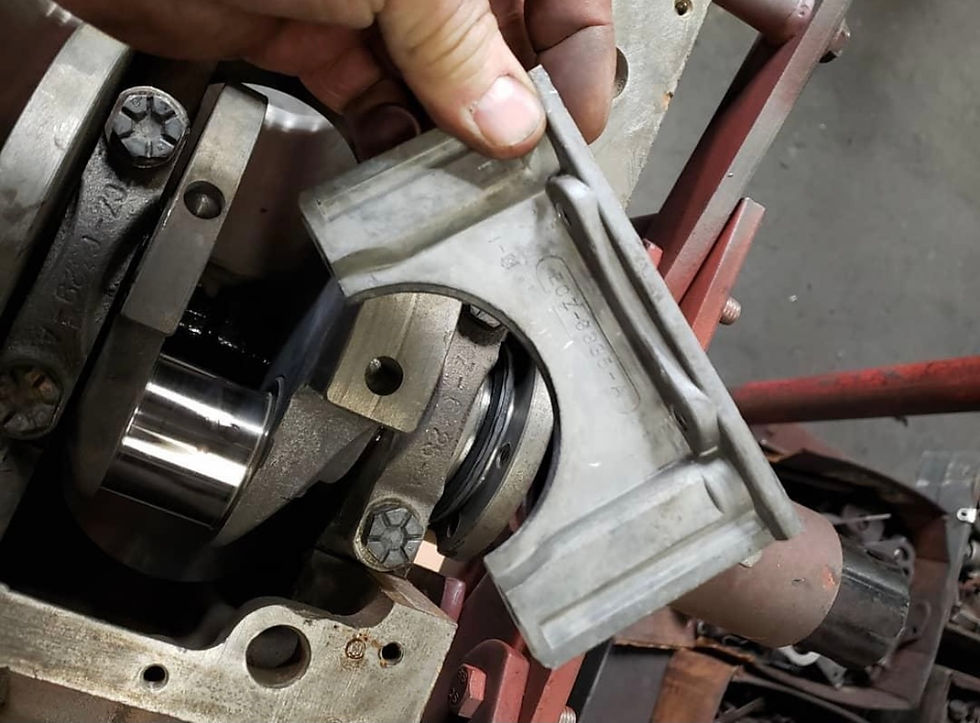
Be sure your retainer is clean, and that there are no burrs or warped edges.
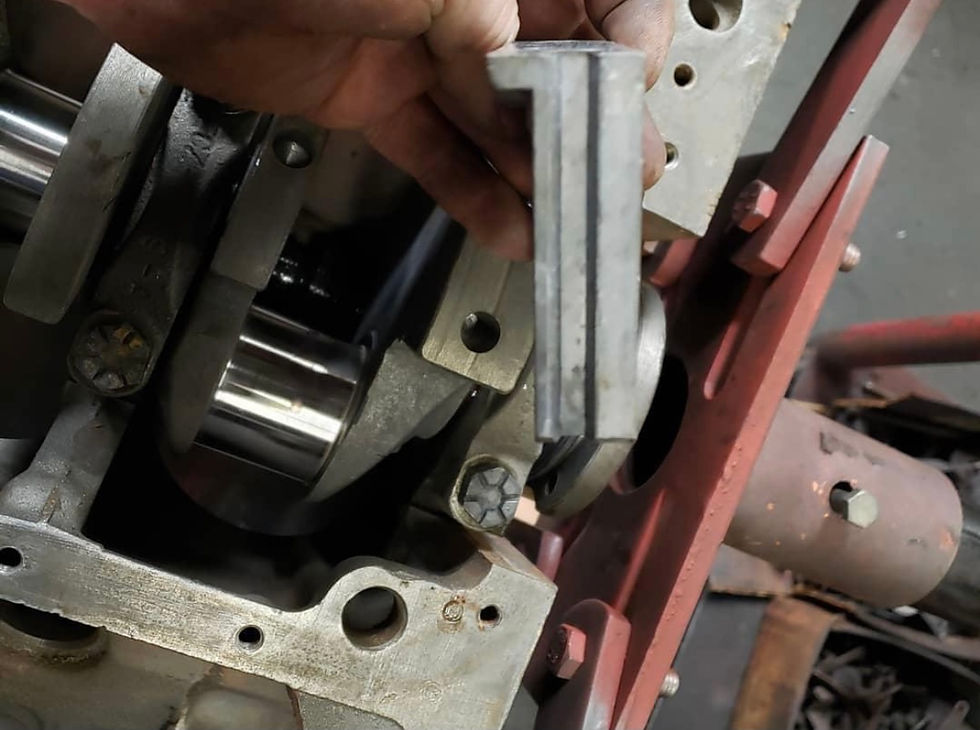
Repeat - you need a clean, straight, burr-free retainer!
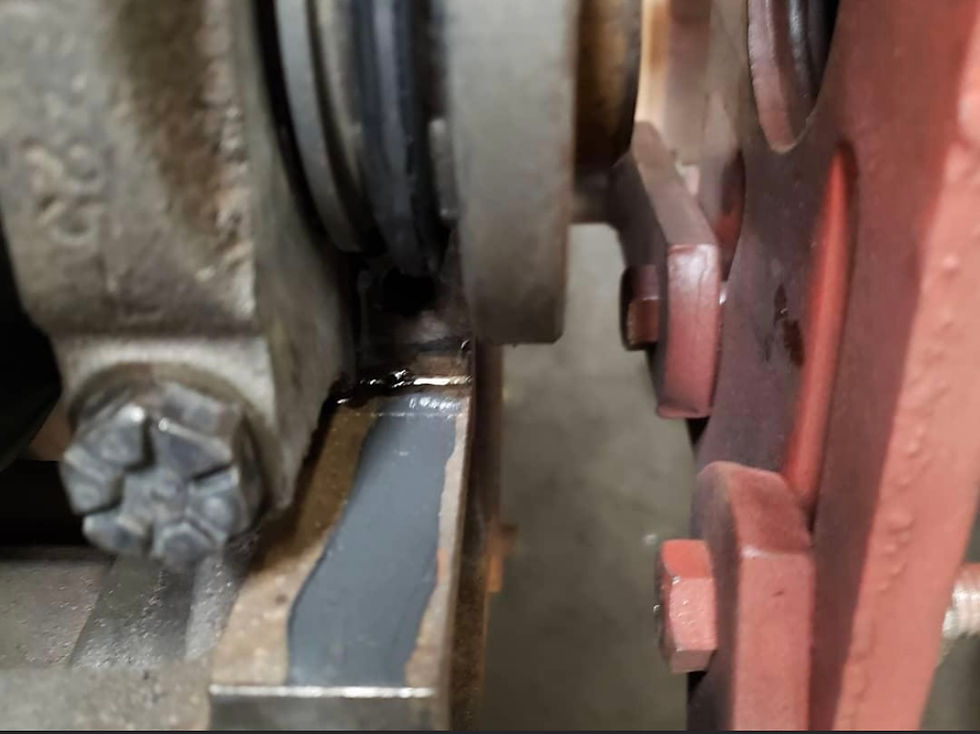
Rub VERY LITTLE rtv on the mating surfaces of the sides of the block and retainer.
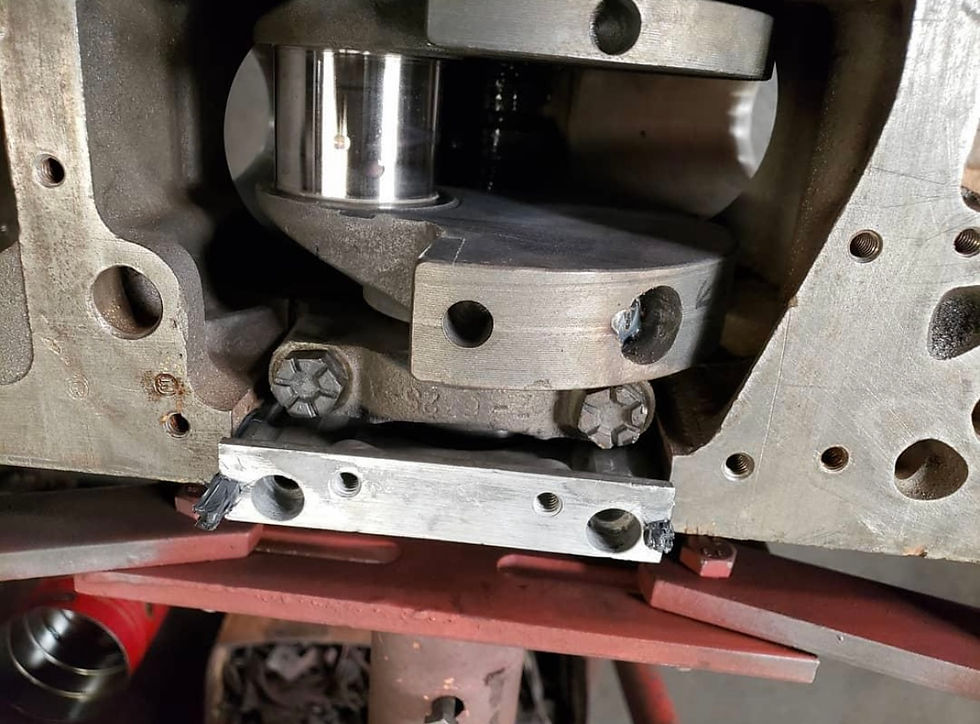
Holding the side seals in place, carefully slip the retainer into position.
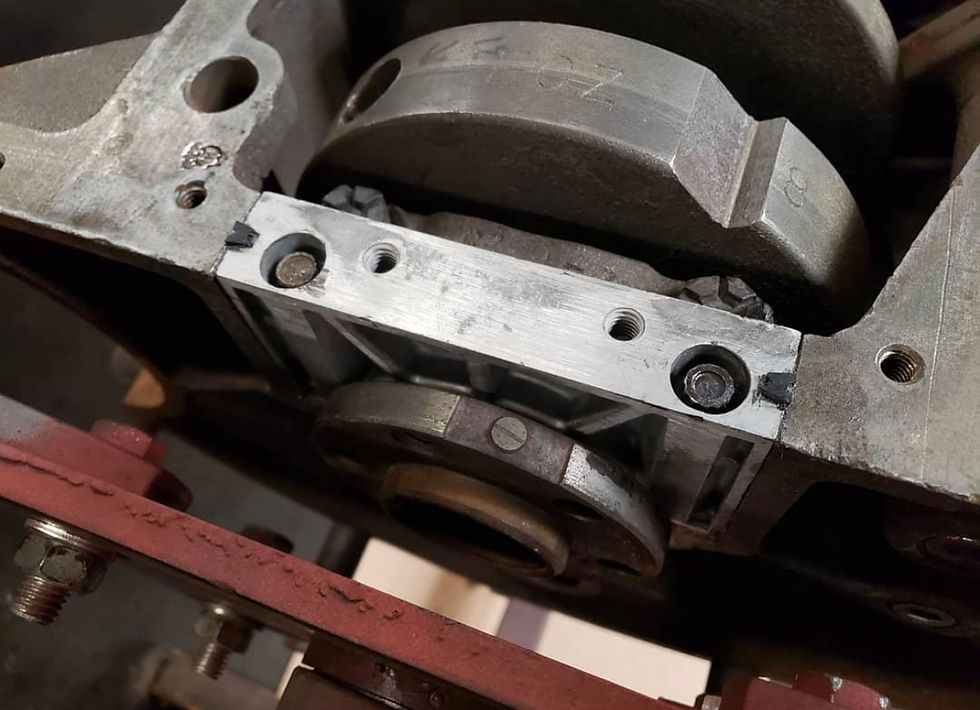
Now bolt it (the retainer) in place and...
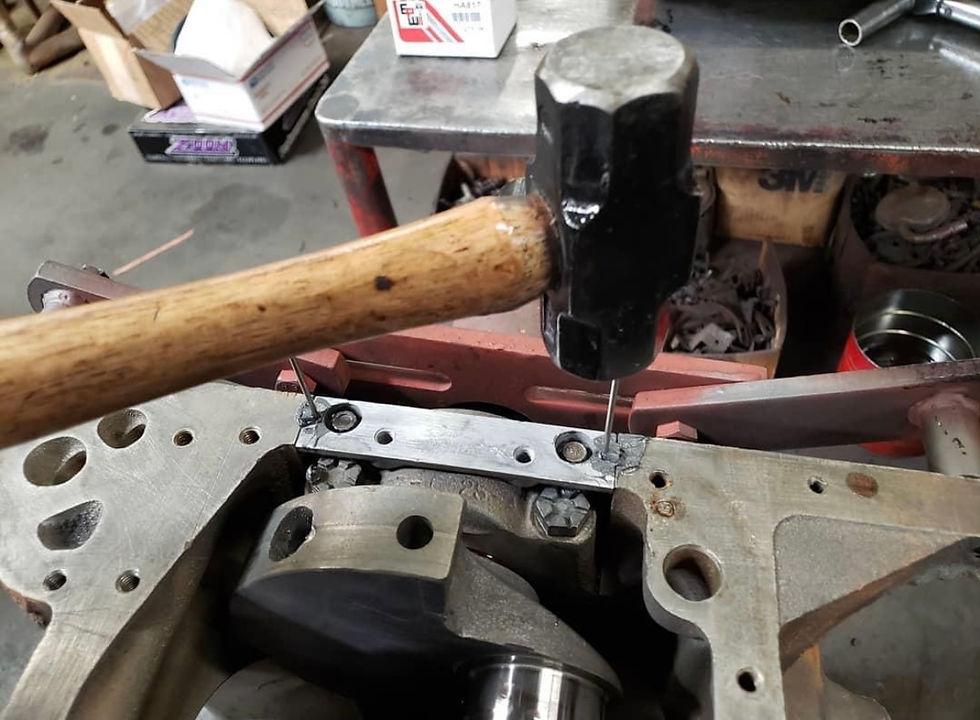
...drive the nails down between the side seals and retainer - NOT THE BLOCK SIDE!
And that my friends is excellent advice from the Y Block Guy! I can remember replacing my rear main seal in my 1955 Ford Fairlane many years ago, only to have it begin leaking with 10 miles. What happened? After owning, driving, and turning wrenches on these things for just about 30 years now, listed below are my top reasons for rear main seal failure in a Y Block.
Blow-by. The number one reason that a rear main seal leaks so bad after in-vehicle replacement is just simply that there is too much crankcase pressure. Y Blocks did not have a PCV system until late in its run here in the States, and the earlier versions had either a downdraft tube on the block or one that swept down from the valley pan. Let's face it, your old Y Block may be in need of a full rebuild or at least a new set of rings. These days, my recommendation is to do it right. You will get much more enjoyment out of the engine and driving experience! Setting up a positive crankcase pressure system is a good way to keep the seal from leaking.
Rope Seal. The original style of rear main seal for the Y Block was a rope with asbestos material in its manufacture. These did a decent job in their day, but over time the rope seal is more prone to "give way" than a modern neoprene seal. Plus, I do not believe that modern materials that make up the current rope seals offering are up to snuff if you know what I mean.
Incorrect Installation. Tim McMaster gives excellent advice above, as does Ted Eaton if you read over his article. The Y Block Magazine is also a good source. Stay away from the keyboard mechanics on social media that declare the availability of a one-piece rear main seal for the Y Block. They have been sniffing rich exhaust or something. For the in-vehicle replacement it is very easy to damage the back-side of the seal if you do not "roll it in" correctly. At times, I have dropped the mains just a hair or two so that I could gain a little more room to slide the seal in. Do not leave out the sealer for the side seals. I even put a small dab on the bottom of the retainer where it meets the block as well. Bear in mind also that the two studs for the oil pan are open to the oil. If you do not use sealer on the studs in your rear main seal retainer then you are guaranteed a leak via the threads. Another reminder - the lip! Ensure that the lip faces inward to the crank throws.
Warped Retainer. This is often the result of an overzealous attempt at sealing the retainer to the block. I would not go over 15-20 foot pounds for those 12 point bolts that secure the retainer to the block. Keep in mind that the retainer is aluminum and is not as forgiving as cast iron.
Incorrect Seal. This only applies to the 312. Up until 15 years ago or so, there was no available neoprene rear main seal for the 312, only the other cubic inch sizes (same seal for all 4 - 239, 256, 272, and 292). I remember some were modifying a Chrysler rear main seal since it was extremely close in measurement but it did have to be cut down. Obviously, ensure you have the correct seal before proceeding with the repair.
If you do need to make the repair in the vehicle, then do consider a "Sneaky Pete" rear main seal tool. I have sold quite a few of these over the years - they come with a tool to remove the original rope seal or a pin to begin pushing out the neoprene seal. Chinese fingers can be used (or a similar type draw tool) if you desire to go with a rope seal again. Just be sure to trim the rope seal cleanly at the block and to roll the rope seal tightly in the retainer before you trim it there.
That rear main seal tool is on this page of my website: https://www.hotrodreverend.com/ebay-ecommerce-2
Fast Fords
We are still green light all the way looking towards Father's Day weekend for the Fast Fords racing event at Dragway 42 in West Salem, Ohio. Enthusiasts are already booking hotels. As for me and my pit crew, we will be staying at the Holiday Inn Express in Wooster not too far away. The official hotel of Dragway 42 is the Best Western of Wooster as well. (I am sure they are "car friendly" as it were.)

Speaking of Fast Fords, it looks like we now have a logo for Hot Rod Reverend Ministries. I did just get some letterhead finished up, and my pit crew will be easily identified with t-shirts that bear the insignia. I sure do hope you can join us!

A graphic designer in Winchester, Virginia sent me this logo idea.
If you have not done so already please subscribe to the blog to receive email updates at this page: https://www.hotrodreverend.com/blog-subscribe. There are a good number of you who contact me each week looking for information I have already posted to the website blog pages. It would help if you were receiving notifications every time a new post went live. Do not forget to tell your friends and your buddies - visit HotRodReverend.com today and share the link!
The Hot Rod Reverend
aka Daniel Jessup




Comments