
1955 Ford Part 40: Windshield Wipers & Wiper Motor Upgrade
- Hot Rod Reverend
- Mar 12, 2018
- 4 min read
Updated: Dec 27, 2019
Installing Windshield Wipers & Electric Wiper Motor

(NOTE: this is a re-post of an article originally published back in February of 2018. The original wording, photos, and videos were lost by the host website. We do apologize.)
In the mid 50's most automobiles still used the antiquated wiper motor that was driven by engine vacuum. Apart from the hissing noise most of these units made, the most troublesome aspect of operation was since the motor was driven by engine vacuum anytime you lost engine vacuum (for instance while under load), the wipers would slow way down to a snail's pace making it almost impossible to see anything out of the windshield glass during a driving rain. Frustrating to say the least. The original motor I had was in good working order but I desired to have a wiper motor that worked from electric current. There were options available but a few of these did not have the ability to retain the original wiper knob - something I greatly desire to have.
Enter the Newport Engineering Company. Pictured above are the entire contents of a kit specific to the 1955/56 Ford passenger cars and of course this electric motor used a 12 volt supply so that was right down my alley. The motor installed into the original location, used the original wiper arms, and I also purchased a separate adapter to keep my original 55 Ford knob on the dash.


The original wiper arms and motor were already absent from the dash so the first thing to do after checking the contents to was to go ahead and bench test the wiper motor itself with the supplied harness and switch.
After I was satisfied with the test I took out the original arms that attach to the pivot on the motor and installed the new plastic bushings from Newport. The original rubber bushings were dry and worn out, but since the studs on the new motor were a different size the original bushings would not have worked anyway. The washers and clips were also supplied in the kit.


The instructions for all of the procedures were laid out pretty well from what I could tell, but little did I know that when clearance issues were mentioned, and special notes were given concerning when to connect the arms to the wiper motor pivot, that it would take a few hours to get everything in. For the most part the difficulty lies in the fact that the arms have to be attached before the motor can be secured to the bracket under the dash.


The instructions were thorough and covered just about every detail needed. The only improvement that I thought could be made would be to change out the the two screws that secured the motor to the bracket for two studs. I went ahead and did that on my own and this made installation much easier. The company did provide "extras" as these parts are quite small and there is tendency to drop these pieces as you wrestle things together in very close quarters!


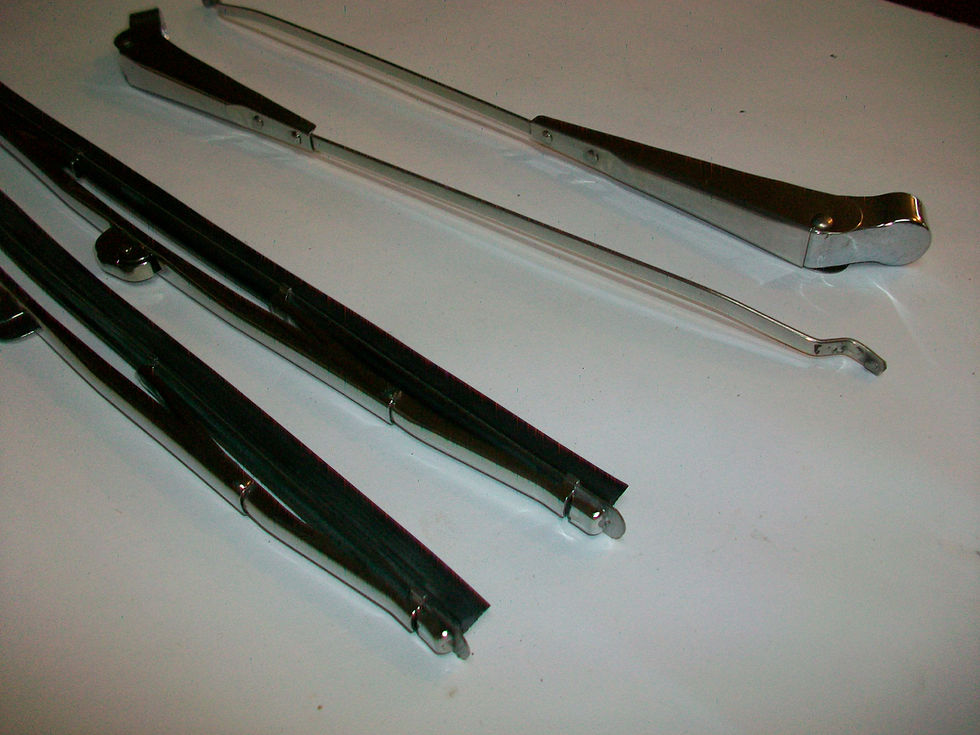
I was able to snap a photo of how things looked when I was attaching the arms to the motor. I was glad I had labeled the wiper arms. However, nothing in the instructions said anything about which arm went to which particular stud on the motor pivot. Wouldn't you know but my first try was WRONG and the whole unit had to be unbolted and the arms switched.


To finish up under the dash the support arm had to be installed (the electric motor is heavier than the vacuum motor).


This was way too tight to snap a photo once installed but from the photos above you can get the idea of how it was oriented. The next step in this process was to install new bezels on the outside of the cowl where the wiper pivots go through the body. I chose to use neoprene gaskets instead of the original paper. The nuts are 3/4".


I chose to leave off the stainless wiper arms and blades for the time being so that I could test the motor, switch, and action of the arms under the dash before orienting everything on the windshield. I turned my attention to the wiring diagram, the switch, and the adapter. For the most part this was the most straightforward of the entire upgrade. The switch was assembled on the bench, the wiring harness was already connected to the motor when installed, and I had taken the time to put terminals on the harness while on the bench.


The Rebel wiring harness already had a lead marked "wipers" so this was pretty easy. I normally use un-insulated, crimped terminals and use my own shrinkwrap. The original knob installed as promised and there was no way to know that an upgraded switch and motor had been installed.

I tested the motor after turning the key to ACC and IGN - things went according to plan and the motor "parked" like it was supposed to do. From there I installed the stainless steel arms and blades on the windshield.


After that was done I sprayed the windshield with water and gave my work a real world test!
I am happy with the results so it's on to the next project!


How do you determine the correct way to attach the wiper arm linkage to the motor? I removed the wiper arms now I can't tell where "park" is
where did buy that extra adapter to keep the original knob?