
1955 Ford Part 39: Windshield Installation
- Hot Rod Reverend
- Feb 20, 2018
- 3 min read
Updated: Apr 14, 2025
Installing Windshield and Stainless Trim

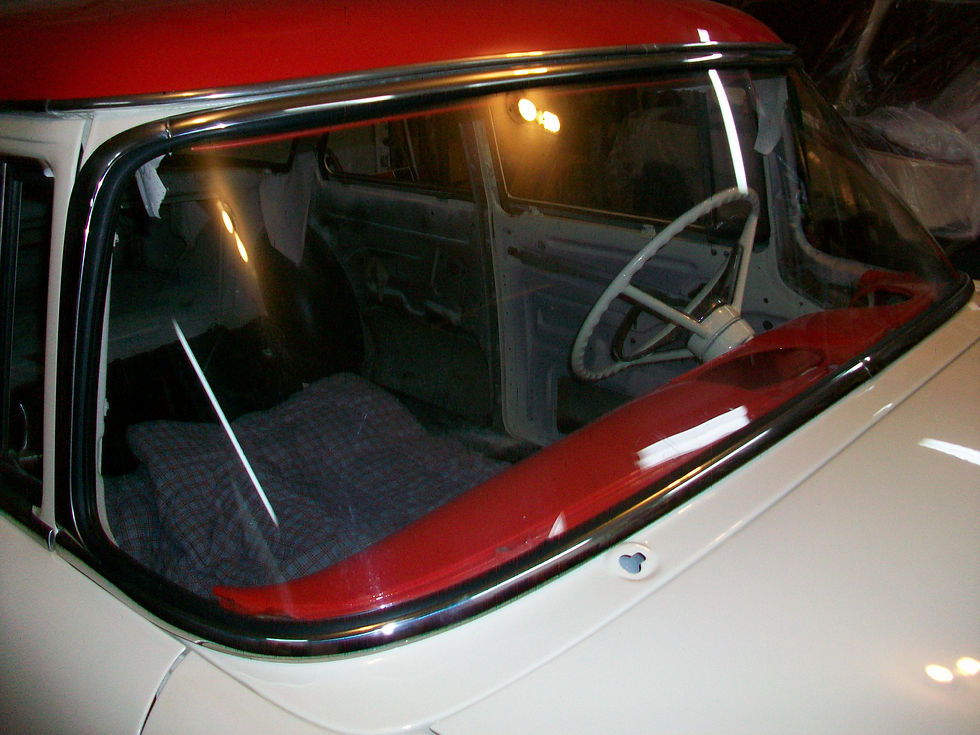
Having accomplished the task of installing the rear glass and stainless steel trim back on the car, it was time to prep the windshield, new rubber seal, and the stainless for the work up front. The windshield I have is not original to the car, but it was acquired from a great uncle of mine who passed away a few months ago. This glass was in much better shape than the one that was sitting in the car because some ne'er-do-well had chucked a piece of asphalt through the windshield while driving by at speed on a summer day when the 55 was parked just outside the home where my parents live in North Carolina. Someone did not care too much for our family.


This glass does look it will need to be polished but it cleaned up well. We used the same Dow U-428 urethane sealer as we did on the rear glass. The seal remained taped to the glass as we went around the entire edge of the windshield. The center line was measured and marked for reference so that we could install the stainless strips correctly – this is always done on the bench before placing the seal, glass, and stainless onto the sheet metal flange for final installation.

Strips of 3M strip caulk were used as well on the sheet metal flange of the body like we did for the rear glass. Next the top stainless was measured and marked for its center line and installed in its groove in the rubber. This is critical as the two holes in the stainless must line up with the holes on the passenger and drivers side of the body. I suggest that you mark their locations – once the seal is in you will not be able to see these holes.


Then we mounted the three lower pieces of stainless, inserting the small center piece onto one of the larger pieces, placing them in the seal as a unit, and then inserting the other side. Care should be taken here because the outermost flanges on either side must come to rest against the forward door pillar. A small screw keeps that edge secure. we used some masking tape to keep from scratching paint.

I did replace all of six of these screws with stainless screws from a local hardware store – check your hole sizes before purchasing – sometimes they are wallowed out. My son helped me install the rope into the INTERIOR edge of the seal and we wrapped this around completely one time with an overlap at the bottom. One thing to note here: I have been told that installing these types of glass from 50’s and 60’s cars always go better if you begin the rope tug on the BOTTOM edge of the seal. I have never tried otherwise to test this theory because I have such good success with beginning on the bottom edge. Basically I work from the middle bottom to the driver’s side and then from the middle bottom to the passenger side, then up each side, then over to the middle top from each side, alternating between passenger and driver’s side.


Along the way, my son helped smack the glass so that the seal would seat onto the flange. It some cases we were extremely tight and a very good tug was needed to pull the seal lip over the flange. I would imagine though that this is a good sign for a watertight seal however.

The uprights on either side were installed next, along with the three screws that go on either side at the pillar AND the two screws at the top on either side that secure that piece of stainless to the body. For the most part, the lower edge of an upright was inserted into the back edge of the stainless, then the top edge of the upright was slid onto the long piece of stainless already installed on the windshield. Once these slid in it was time to push the upright onto the pillar and attach it with two screws. The last screw to be installed was the lower most screw that secured the tip of the lower stainless on each side.


Next up – an aftermarket windshield wiper motor, new bezels, arms, and blades!


Always choose the right auto glass repair company that understands the details of your vehicle and takes the right step to prevent further issues from arising.